Pre-Event Planning (4+ Weeks Out)
☐ Define your streaming objectives. Before touching any technology, clarify what the stream needs to accomplish. Is this an all-hands meeting for internal employees? A public-facing product launch? A gated webinar with registration? A hybrid conference where remote attendees need to interact with the in-room audience? Each scenario has different requirements for platform selection, interactivity features, security and production quality.
☐ Determine expected viewership. The number of concurrent viewers impacts your platform choice, CDN requirements and bandwidth planning. A 200-person internal town hall has different infrastructure needs than a 10,000-viewer public broadcast. Get estimates from your marketing or communications team - even rough numbers help you spec the right solution.
☐ Confirm program content and run of show. Map every element of the program that will appear on the stream: presentations, panel discussions, pre-recorded video playback, Q&A segments, live demos and transition graphics. Your streaming team needs this information to plan camera positions, switching sequences, graphic assets and audio routing. If you haven't already, review our complete corporate event AV checklist for the broader production planning context.
☐ Conduct a venue site survey. Visit the venue (or request detailed technical documentation) to assess internet infrastructure, power availability, camera sight lines and network access points. Identify where the streaming equipment will be positioned relative to the stage, the audio console and the video switcher.
☐ Book your streaming crew. Professional corporate streams require dedicated personnel - a stream engineer to manage encoding and platform monitoring and potentially a separate camera operator and graphics operator depending on the production's complexity. These roles should not be "added on" to existing crew members who are already managing in-room AV.
Internet and Network Requirements
Internet connectivity is the single most critical infrastructure element for live streaming. No amount of expensive cameras, encoders or production talent can compensate for an unreliable internet connection. Here's how to get it right:
☐ Order a dedicated internet line. Never stream over the venue's shared Wi-Fi or general event network. Order a dedicated, hardwired Ethernet connection specifically for streaming. This should be a separate circuit from the event's general internet, attendee Wi-Fi and registration systems. Specify your bandwidth requirements when ordering - most venue IT departments and ISPs can provision dedicated lines with guaranteed upload speeds.
☐ Calculate required bandwidth. Use this formula as a starting point: target stream bitrate × 2 = minimum dedicated upload bandwidth. For a 1080p stream at 6 Mbps video + 320 kbps audio, your total bitrate is approximately 6.3 Mbps - so you need at least 12.6 Mbps of dedicated upload. We recommend 20 Mbps minimum for a single 1080p stream to provide comfortable headroom. For multi-platform simultaneous streaming (simulcasting to YouTube and a custom RTMP endpoint, for example), multiply accordingly.
☐ Arrange bonded cellular backup. For mission-critical streams, deploy a bonded cellular solution (such as Peplink or Mushroom Networks) as a failover internet connection. Bonded cellular aggregates multiple 4G/5G SIM cards to create a combined data connection, providing reliable backup bandwidth even in venues with poor wired infrastructure. We've used bonded cellular as our primary connection in venues where dedicated lines weren't available - it's not ideal, but it's far better than having no backup.
☐ Request a static IP or confirm NAT configuration. Some streaming workflows - particularly SRT (Secure Reliable Transport) in listener mode - require a static public IP address. Confirm with the venue IT team whether a static IP is available or whether you'll be operating behind NAT. If behind NAT, ensure the necessary ports are forwarded for your streaming protocol.
☐ Test DNS resolution and firewall rules. Many corporate venues and hotel ballrooms have aggressive firewalls that block RTMP traffic (port 1935) or other streaming protocols. Request that the venue IT team whitelist your streaming platform's ingest servers and the specific ports your encoder will use. Test this during the site survey - don't wait until show day to discover that the firewall is blocking your stream.
Encoding Setup
The encoder is the heart of your streaming infrastructure - it takes the video and audio from your production and compresses it into a format that can be transmitted over the internet to your streaming platform. Choosing and configuring the right encoder is essential:
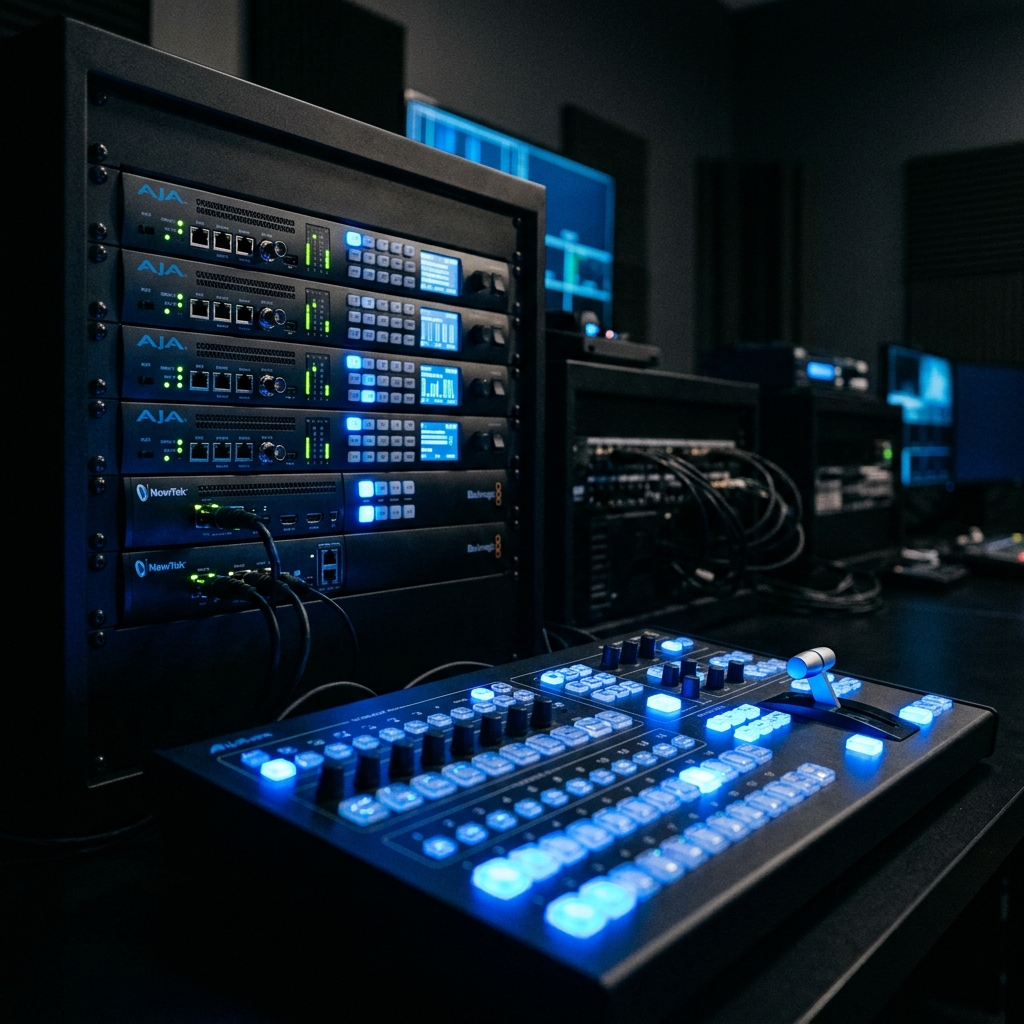
☐ Select your encoder hardware or software. For mission-critical corporate streams, we recommend hardware encoders for their dedicated processing, reliability and lower latency. Our preferred hardware encoders include the Teradek Prism (excellent for multi-destination streaming with built-in bonding), the Kiloview N60 (outstanding NDI-to-streaming bridge) and the AJA HELO Plus (reliable, simple single-destination encoder). For productions that need integrated switching and encoding, vMix running on a dedicated high-performance PC is an excellent software-based solution - but it requires a properly specced machine with a hardware GPU encoder (NVIDIA NVENC).
☐ Configure encoding settings. Recommended baseline settings for corporate 1080p streaming:
• Resolution: 1920×1080 (1080p) - the standard for professional corporate streams
• Frame rate: 30fps for presentations and panels; 60fps only if showing fast motion or gaming content
• Video codec: H.264 (AVC) for maximum compatibility; H.265 (HEVC) only if your platform supports it
• Video bitrate: 4,500–6,000 kbps for 1080p30; 6,000–8,000 kbps for 1080p60
• Keyframe interval: 2 seconds (required by most platforms)
• Audio codec: AAC-LC
• Audio bitrate: 256–320 kbps stereo
• Audio sample rate: 48 kHz
☐ Choose your streaming protocol. SRT (Secure Reliable Transport) is preferred for professional applications - it handles packet loss gracefully, provides end-to-end encryption and adapts to network conditions in real time. If your platform doesn't support SRT ingest, RTMP (Real-Time Messaging Protocol) remains the industry standard with universal platform support. For ultra-low-latency applications (under 1 second), explore WebRTC-based platforms, but be aware of the scalability limitations.
☐ Configure input signals. Confirm the video input format from your video switcher to the encoder. Most professional encoders accept SDI (BNC) or HDMI. SDI is preferred for runs over 15 feet because it supports longer cable distances without signal degradation. Ensure the output resolution and frame rate from the switcher exactly match the encoder's input settings to avoid unnecessary scaling, which introduces latency and can reduce image quality.
Platform Configuration
Every streaming platform has specific requirements and configuration steps. Here's a platform-by-platform breakdown for the most common corporate streaming destinations:
☐ YouTube Live. Create the live event in YouTube Studio at least 24 hours in advance. Set the stream key, configure privacy (public, unlisted or private), enable DVR for viewers who join late and set up the auto-start/auto-stop preferences. YouTube supports RTMP and HLS ingest. If using a custom thumbnail, upload it before the stream begins. Enable the live chat moderation dashboard and assign moderators.
☐ Vimeo. Vimeo's enterprise streaming offering (Vimeo OTT or Vimeo Enterprise) provides better privacy controls, customizable players and domain-restricted viewing - making it popular for internal corporate communications. Configure the RTMP ingest point, set up password protection or SSO authentication if required and test the embedded player in its destination webpage.
☐ Microsoft Teams Live Events / Town Halls. For internal corporate streams, Teams integration is often required. Configure the event in the Teams admin center, assign producers and presenters and test the RTMP-in workflow if using external encoders (available with Teams Premium or certain enterprise licenses). Note that Teams live events have a 20-second delay by default - set expectations with stakeholders accordingly.
☐ Zoom Webinars. Configure the webinar settings, enable practice session mode for pre-show rehearsal, set up registration if required and configure the RTMP custom live streaming feature if you're simultaneously streaming to another platform. Test the screen-share and video-share workflows with the actual presentation content.
☐ Custom RTMP endpoints. For clients using proprietary platforms, internal CDNs or third-party webcasting services, obtain the RTMP or SRT ingest URL and stream key. Verify the platform's encoding requirements - some custom platforms have specific codec, resolution or bitrate constraints that differ from the major platforms.
Camera and Switching
The visual quality of your live stream is determined by your camera setup, switching workflow and the video production design that ties it all together:
☐ Design your multi-camera setup. A minimum of two cameras is essential for professional corporate streams - a wide shot and a tight shot on the presenter. Three cameras (wide, tight and a 45-degree offset) provide significantly more visual variety and keep remote viewers engaged. For panel discussions, add a camera position covering the full panel and individual tight shots on key participants.
☐ Select appropriate camera positions. Camera positions should provide clean sight lines without obstructing the in-room audience. Avoid positions that require shooting into stage lighting - this creates lens flare and washed-out images. Consider the relationship between camera angle and the stage lighting design; your lighting designer and camera operators need to coordinate to ensure presenters are well-lit for both the room and the stream.
☐ Configure ISO recording. Record an isolated (ISO) feed from each camera in addition to the switched program output. ISO recordings provide editing flexibility in post-production and serve as a backup if the program recording fails. Record in a higher quality format than the stream - ProRes 422 or DNxHR for editing, even if you're streaming at H.264. Most professional video switchers (Blackmagic ATEM, Ross Carbonite, Grass Valley) support simultaneous ISO recording and program output.
☐ Program the switcher with stream-specific transitions. Cuts and dissolves translate well to streaming; complex wipes and 3D transitions often look poor at streaming bitrates because they create high-motion frames that the encoder struggles to compress cleanly. Keep transitions clean and deliberate.
Ready to Elevate Your Next Event?
FPC delivers flawless AV production for corporate keynotes, product launches and hybrid conferences.
Get a Production QuoteAudio for Stream
Audio quality makes or breaks a live stream. Viewers will tolerate slightly imperfect video, but poor audio causes them to leave within seconds. The stream audio mix requires specific considerations that differ from the in-room audio production:
☐ Create a dedicated stream audio mix. The stream mix should be a separate output from your audio console - never simply a tap off the main room mix. The in-room mix accounts for the natural acoustics of the venue, room reinforcement and the audience's physical proximity to the stage. The stream mix must stand alone as a complete audio experience for someone wearing headphones. This means adjusting levels, EQ and dynamics processing specifically for the broadcast output.
☐ Apply broadcast-style compression. Stream audio benefits from tighter dynamic range than live room audio. Apply a gentle compressor (2:1 to 4:1 ratio, moderate attack and release) on the stream mix bus to keep levels consistent and prevent loud spikes that cause clipping in the encoder. Follow this with a limiter set at -3 dBFS to provide headroom and prevent digital clipping.
☐ Target loudness standards. For corporate streams destined for YouTube, Vimeo or internal platforms, target -16 LUFS (Loudness Units Full Scale) integrated loudness. This is the standard that most platforms normalize to and mixing to this target ensures your stream audio won't be significantly altered by platform-side processing. Use a loudness meter (built into most digital audio consoles and DAWs) to monitor in real time.
☐ Include room ambience judiciously. A completely dry stream mix - with only direct microphone feeds and no room sound - can feel sterile and disconnected. Mix in a small amount of ambient room microphone to provide a sense of the live environment, especially during Q&A segments and audience reactions. Use ambient mics conservatively; too much room sound muddies the stream audio and introduces feedback risk.
☐ Test audio sync. Audio-video synchronization (lip sync) must be verified through the entire signal chain - from the microphone through the audio console, into the video switcher or audio embedder, through the encoder and on the streaming platform. Lip sync issues as small as 80 milliseconds are perceptible and unprofessional. Test and adjust encoder audio delay settings as needed.
Graphics and Lower Thirds
Stream graphics serve a functional purpose beyond aesthetics - they identify speakers, provide context for remote viewers who may have joined mid-session and reinforce brand presence throughout the broadcast:
☐ Design lower-third graphics with stream resolution in mind. Text that's readable on a large in-room screen may be too small on a laptop or phone screen where most stream viewers watch. Use a minimum 32px font height at 1080p resolution for lower-third name/title text. Keep text concise - long titles and descriptions get cut off or become illegible on mobile devices.
☐ Prepare title cards, holding slides and BRB screens. Create a pre-show holding graphic (displayed before the stream goes live), intermission/BRB screens for breaks and a post-show thank-you card. These ensure remote viewers always see something intentional rather than a frozen frame, an empty room or the production crew setting up.
☐ Pre-build all speaker lower thirds. Create lower-third graphics for every speaker, panelist and moderator before show day. Verify name spellings, titles and company affiliations with the client. Having pre-built graphics eliminates the risk of on-the-fly typos and ensures consistent formatting across all speakers.
☐ Test graphic overlays in the encoder or switcher. If using a hardware encoder with built-in graphics (like the Teradek Prism) or downstream keying from the video switcher, test all graphic assets in their final position on the stream output. Check for safe-area compliance - critical text and logos should be within the 90% safe area to avoid cropping on various playback devices.
Redundancy Planning
For corporate events where streaming failure would have significant business consequences - investor presentations, regulatory communications, global all-hands meetings - redundancy isn't optional. Here's how to build a resilient streaming infrastructure:
☐ Deploy dual encoders. Run a primary and backup encoder simultaneously, both receiving the same video and audio feed from the switcher. If the primary encoder fails, the backup can be switched to the live stream key within seconds. Some encoders, like the Teradek Prism, support automatic failover - if the primary unit stops sending, the backup takes over automatically.
☐ Provision dual internet paths. Your primary dedicated line and bonded cellular backup should be connected to separate encoders or to a network failover switch. If the primary internet drops, the stream can continue over cellular without interruption. We've had this failover save client streams on multiple occasions - hotel conference centers are particularly prone to internet instability during peak usage.
☐ Record locally as a backup. Regardless of streaming redundancy, always record the program output locally to a dedicated recording device (Blackmagic HyperDeck, AJA Ki Pro or a simple SSD recorder). This ensures you have a high-quality recording even if the stream experiences issues. Record in a production-quality codec (ProRes or DNxHR), not the compressed stream format - you can always compress later for VOD distribution.
☐ Prepare a pre-recorded backup. For the highest-stakes streams, have the keynote and critical presentations pre-recorded as a backup. If the live stream or in-room production experiences a catastrophic failure, you can switch to the pre-recorded version and maintain continuity for remote viewers. This is standard practice for pharmaceutical industry events and investor presentations where the content must be delivered regardless of circumstances.
Test Stream Protocol
Testing is the most overlooked and most critical element of live stream preparation. Here's the testing protocol we use across our live streaming productions:
☐ 48-hour pre-event test. Two days before the event, conduct a full end-to-end test stream to the actual platform. This test should use the actual encoder, the actual internet connection (if accessible) and representative content. Run the test for at least 30 minutes to identify stability issues that don't appear in short tests. Verify the stream appears correctly on the viewing page, check audio levels and lip sync and confirm recording is functioning.
☐ Day-of technical rehearsal. On show day, begin a test stream at least 2 hours before the live broadcast. Run through the complete show flow: opening graphics, speaker introductions, presentation content, transitions between segments, Q&A workflow and closing sequence. This rehearsal should involve the actual production crew, the actual content and the actual equipment in its show-day configuration.
☐ Verify on multiple devices. During testing, have team members verify the stream on different devices - desktop browser, mobile phone, tablet - and different networks (venue Wi-Fi, cellular data). Check for buffering, audio issues, graphic legibility and overall quality on each device type.
☐ Document stream URLs and keys. Create a shared document with all critical streaming information: platform login credentials, stream keys, RTMP/SRT URLs, backup encoder settings, venue IT contact information and ISP support numbers. Distribute this to all streaming crew members and keep a printed copy at the streaming position.
Show Day Checklist
When the stream goes live, your focus shifts from setup to monitoring and real-time problem solving:
☐ Assign a dedicated stream monitor. One person should be watching the live stream output on the actual platform - not the encoder preview, not the switcher output, but the viewer-facing stream. This person monitors for buffering, quality drops, audio issues, graphic errors and chat activity. This role cannot be combined with other technical positions; it requires full-time attention.
☐ Set up a monitoring dashboard. Display the following on dedicated screens at the streaming position: encoder status and bitrate graph, streaming platform health/ingest metrics, the live viewer-facing stream (with a ~15-second delay), backup encoder status, internet speed test results (bookmark a speed test for periodic checks) and chat/Q&A feed if applicable.
☐ Verify recording is active. Before the stream goes live, confirm that both the platform recording (cloud recording) and local recording (SSD recorder) are active and capturing. Check available storage - a 4-hour event at ProRes 422 can consume 250+ GB. It sounds obvious, but we've seen six-figure events where no one verified that the record button was actually pressed.
☐ Manage chat moderation. If your stream includes a public or semi-public chat, assign a moderator to manage incoming messages, surface questions for Q&A segments and remove inappropriate content. Prepare a moderation plan - what types of messages should be flagged, how questions are routed to the moderator on stage and who has authority to remove comments.
☐ Communicate stream status to the production team. The stream engineer should be on the production intercom (Clear-Com, RTS or Bolero wireless) and provide regular status updates to the technical director: "Stream is live and stable," "Viewer count at 450," "Buffering detected, investigating," etc. The TD needs to know the stream status to make informed decisions about pacing and transitions.
Post-Stream Wrap-Up
The stream ending doesn't mean the work is done. Post-stream procedures ensure you capture the full value of the broadcast:
☐ Process the VOD recording. Download the platform recording and the local recording. Compare quality and select the best source for VOD distribution. If needed, edit out pre-show holds, intermissions and post-show dead time. Export in the platform's recommended format - YouTube recommends H.264 with AAC audio at the original stream resolution.
☐ Review analytics. Pull viewership data from the streaming platform: peak concurrent viewers, average watch time, viewer drop-off points, geographic distribution and device breakdown. This data is invaluable for planning future events and demonstrating ROI to stakeholders.
☐ Document lessons learned. Within 48 hours of the event, conduct a brief post-mortem with the streaming crew. What worked well? What technical issues occurred? What would you change? Document these findings and incorporate them into your process for the next event. This continuous improvement loop is what separates good streaming operations from great ones.
☐ Archive stream keys and platform configurations. If this is a recurring event, save the platform configuration, encoder presets and production documentation for next time. Having a baseline configuration dramatically reduces setup time for subsequent streams.
If you're planning a corporate live stream and want professional support from a team that's executed hundreds of successful broadcasts, contact FPC. We provide end-to-end live streaming production - from pre-event planning through show-day execution - as part of our production consulting services.